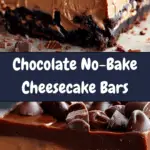
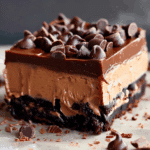
If you’re in the mood for a rich and creamy dessert without the hassle of turning on the oven, these Chocolate No-Bake Cheesecake Bars are the perfect solution. With a graham cracker crust, a smooth cheesecake filling, and a decadent chocolate topping, these bars offer the ultimate combination of textures and flavors in every bite. They’re easy to make and even easier to enjoy!

Ingredients
1 ½ cups graham cracker crumbs
¼ cup sugar
½ cup butter, melted
1 (8 oz) package cream cheese, softened
½ cup powdered sugar
1 teaspoon vanilla extract
1 ½ cups heavy whipping cream
1 cup semisweet chocolate chips
(Tip: You'll find the full list of ingredients and measurements in the recipe card below.)
Directions
In a medium bowl, I mix the graham cracker crumbs, sugar, and melted butter until well combined. Then, I press this mixture into the bottom of an 8x8-inch baking pan to form the crust. I place it in the fridge to chill while I prepare the filling.
In a large bowl, I beat the softened cream cheese, powdered sugar, and vanilla extract until smooth and creamy.
In a separate bowl, I whip the heavy cream until stiff peaks form. Then, I gently fold the whipped cream into the cream cheese mixture until fully combined.
I spread the cheesecake filling evenly over the graham cracker crust in the baking pan. I place the pan back in the fridge to set for at least 3 hours, or overnight for the best results.
To make the chocolate topping, I melt the chocolate chips in a microwave-safe bowl in 20-30 second intervals, stirring in between until smooth.
I pour the melted chocolate over the chilled cheesecake layer and spread it out evenly. I refrigerate the pan for another 30 minutes to allow the chocolate to set.
Once the chocolate has hardened, I slice the dessert into bars and enjoy!
Servings and Timing
Servings: 12 servings
Prep Time: 20 minutes
Chill Time: 3 hours 30 minutes
Total Time: 3 hours 50 minutes
Variations
Add Fruit: For a pop of color and a tangy contrast, I like to add fresh berries on top of the chocolate layer, like raspberries or strawberries.
Different Crust: If I’m in the mood for something different, I might use crushed Oreos or chocolate graham crackers for the crust instead of traditional graham crackers.
More Chocolate: If I’m a serious chocolate lover, I can drizzle extra chocolate over the top or add some chocolate shavings for extra texture and flavor.
Storage/Reheating
I store these cheesecake bars in an airtight container in the fridge for up to 4 days. The bars will stay fresh and delicious, and the chocolate topping will stay perfectly set. I don’t recommend reheating them, as the creamy texture of the cheesecake is best enjoyed chilled.
FAQs
How long should I refrigerate the cheesecake bars before serving?
I recommend refrigerating the cheesecake bars for at least 3 hours to ensure the cheesecake filling sets. For the best results, though, I let them chill overnight.
Can I freeze these cheesecake bars?
Yes, I can freeze them! After they’ve been chilled and the chocolate topping has set, I wrap them tightly in plastic wrap or place them in an airtight container and freeze them for up to 2 months. When I’m ready to eat them, I let them thaw in the fridge for a few hours before serving.
Can I use a different type of chocolate?
I love semisweet chocolate for the topping, but I can easily switch it out for milk chocolate or dark chocolate depending on my preference. Just make sure to melt the chocolate slowly and carefully.
Is there a substitute for heavy whipping cream?
If I don’t have heavy whipping cream, I can substitute it with whipped topping or use half-and-half for a lighter filling. However, the texture may not be as rich and creamy.
Can I make these bars without the crust?
I could skip the graham cracker crust for a crustless version, but the bars might be a little messier to serve. The crust adds a nice crunchy contrast to the creamy filling, so I highly recommend keeping it.
Conclusion
These Chocolate No-Bake Cheesecake Bars are my go-to dessert when I want something indulgent without the effort of baking. The combination of the graham cracker crust, creamy cheesecake filling, and rich chocolate topping is simply irresistible. They’re a perfect dessert for any occasion and can easily be made ahead of time, making them an ideal treat for busy days or special gatherings. I know I’ll be making these again and again!
Recipe:
Chocolate No-Bake Cheesecake Bars
5 Stars 4 Stars 3 Stars 2 Stars 1 Star
No reviews
- Author: Cheryl
- Total Time: 3 hours 50 minutes
- Yield: 12 servings
- Diet: Vegetarian
Description
These Chocolate No-Bake Cheesecake Bars combine a crunchy graham cracker crust with a smooth, creamy cheesecake filling and a rich chocolate topping, all without needing to turn on the oven. A perfect, easy-to-make treat!
Ingredients
1 ½ cups graham cracker crumbs
¼ cup sugar
½ cup butter, melted
1 (8 oz) package cream cheese, softened
½ cup powdered sugar
1 teaspoon vanilla extract
1 ½ cups heavy whipping cream
1 cup semisweet chocolate chips
Instructions
- In a medium bowl, mix the graham cracker crumbs, sugar, and melted butter until well combined. Press this mixture into the bottom of an 8x8-inch baking pan to form the crust. Chill in the fridge.
- In a large bowl, beat the softened cream cheese, powdered sugar, and vanilla extract until smooth and creamy.
- In a separate bowl, whip the heavy cream until stiff peaks form. Gently fold the whipped cream into the cream cheese mixture until fully combined.
- Spread the cheesecake filling evenly over the chilled graham cracker crust. Refrigerate for at least 3 hours, or overnight for best results.
- To make the chocolate topping, melt the chocolate chips in a microwave-safe bowl in 20-30 second intervals, stirring between each interval until smooth.
- Pour the melted chocolate over the chilled cheesecake layer and spread it out evenly. Refrigerate for another 30 minutes to set the chocolate.
- Once the chocolate has hardened, slice the dessert into bars and serve.
Notes
For a tangy contrast, add fresh berries like raspberries or strawberries on top of the chocolate layer.
Consider using crushed Oreos or chocolate graham crackers for the crust for a variation.
If you’re a chocolate lover, drizzle extra chocolate on top or add chocolate shavings.
Store in an airtight container in the fridge for up to 4 days.
These bars can be frozen for up to 2 months. Thaw in the fridge before serving.
- Prep Time: 20 minutes
- Cook Time: 0 minutes
- Category: Dessert
- Method: No-bake
- Cuisine: American
Nutrition
- Serving Size: 1 bar
- Calories: 290
- Sugar: 20g
- Sodium: 150mg
- Fat: 21g
- Saturated Fat: 12g
- Unsaturated Fat: 7g
- Trans Fat: 0g
- Carbohydrates: 25g
- Fiber: 1g
- Protein: 3g
- Cholesterol: 55mg

