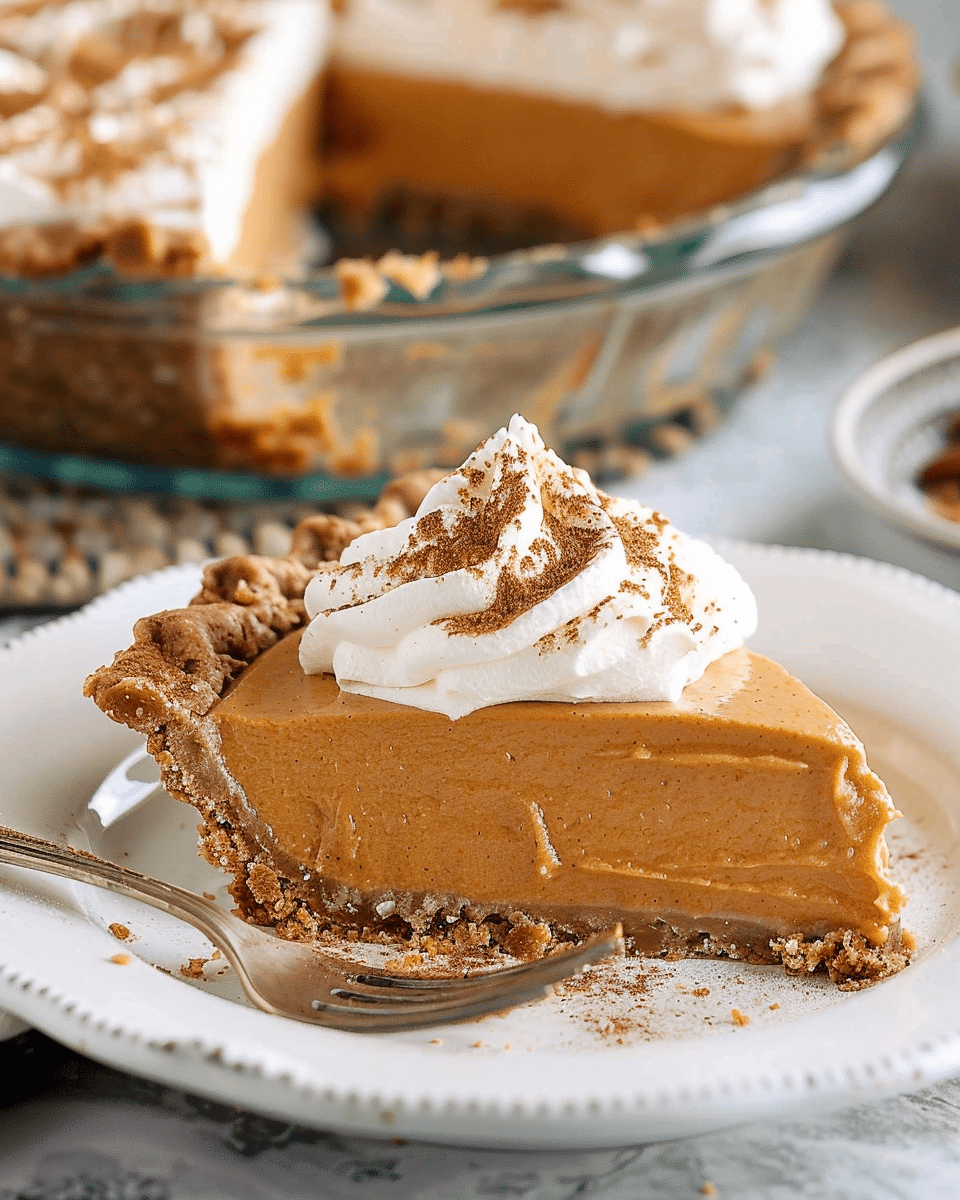
Creamy, spiced, and ultra-smooth, this No-Bake Pumpkin Pie is everything I love about fall desserts—without ever turning on the oven. It’s made with wholesome ingredients and delivers the perfect balance of sweetness and spice, making it a crowd-pleasing option for holidays or anytime I want a cozy treat with minimal effort.
Ingredients
(Tip: You'll find the full list of ingredients and measurements in the recipe card below.)
For the crust:
1 ½ cups graham cracker crumbs (gluten-free if needed)
¼ cup coconut oil or melted butter
2 tablespoons maple syrup
For the filling:
1 cup canned pumpkin puree
½ cup full-fat coconut milk (or dairy-free cream)
¼ cup maple syrup
⅓ cup almond butter or peanut butter
2 teaspoons pumpkin pie spice
1 teaspoon vanilla extract
⅛ teaspoon salt
1 tablespoon cornstarch or arrowroot powder
Optional toppings:
Coconut whipped cream
Crushed pecans
Cinnamon dusting
Directions
I start by combining the graham cracker crumbs, melted coconut oil, and maple syrup in a bowl. I mix it until it’s fully combined and sticky.
Then, I press the crust mixture firmly into a 9-inch pie dish and place it in the freezer to firm up while I prepare the filling.
In another bowl, I stir together the pumpkin puree, coconut milk, maple syrup, almond butter, pumpkin pie spice, vanilla extract, salt, and cornstarch. I mix until the filling is smooth and creamy.
I pour the filling over the prepared crust and use a spatula to spread it evenly.
The pie goes into the fridge to chill for at least 6 hours or overnight until it’s completely set.
Just before serving, I like to top it with coconut whipped cream, a few crushed pecans, and a light dusting of cinnamon.
Servings and timing
Servings: 8 slices
Prep time: 10 minutes
Chill time: 6 hours
Total time: 6 hours 10 minutes
Calories per serving: 290 kcal
Variations
I sometimes swap the almond butter with cashew butter for a milder flavor.
To make it nut-free, I use sunflower seed butter instead.
I’ve also tried adding a layer of melted dark chocolate over the crust before adding the filling—absolutely delicious.
If I want a firmer texture, I use dairy-free cream cheese in place of half the coconut milk.
For a festive touch, I add a splash of bourbon or rum to the filling.
Storage/Reheating
I store the no-bake pumpkin pie covered in the refrigerator for up to 5 days. It keeps its texture beautifully. If I want to freeze it, I wrap it tightly and store it for up to 2 months. To serve, I thaw it in the fridge overnight. Since it's a chilled dessert, reheating isn’t necessary or recommended.
FAQs
How long does the no-bake pumpkin pie take to set?
I usually let it chill for at least 6 hours, but overnight gives the best results for a firm, sliceable texture.
Can I use fresh pumpkin puree instead of canned?
Yes, I can use homemade pumpkin puree. I just make sure it's not too watery—draining excess moisture helps achieve the right consistency.
Is there a substitute for coconut milk?
Absolutely. I’ve used dairy-free cream, cashew cream, or even silken tofu blended smooth. Each adds a different richness.
What if I don’t have pumpkin pie spice?
No problem—I mix 1 teaspoon cinnamon, ¼ teaspoon each of nutmeg, ginger, and cloves or allspice as a quick homemade version.
Can I make this ahead for Thanksgiving?
Definitely. I make it the night before and keep it in the fridge. It actually tastes even better after sitting overnight.
Conclusion
This No-Bake Pumpkin Pie has become one of my favorite go-to desserts for the fall season. It’s easy to make, full of comforting autumn flavors, and adaptable for a range of dietary needs. Whether I'm prepping for Thanksgiving or just craving something sweet and seasonal, this pie hits the mark every time.
Recipe:
No-Bake Pumpkin Pie
5 Stars 4 Stars 3 Stars 2 Stars 1 Star
No reviews
- Author: Cheryl
- Total Time: 6 hours 10 minutes
- Yield: 8 slices
- Diet: Vegan
Description
This No-Bake Pumpkin Pie is a creamy, spiced dessert made with wholesome, plant-based ingredients. It requires no oven time, making it a perfect make-ahead treat for fall gatherings or holiday dinners. With a gluten-free graham cracker crust and a rich pumpkin filling, it’s vegan-friendly and full of cozy autumn flavors.
Ingredients
1 ½ cups graham cracker crumbs (gluten-free if needed)
¼ cup coconut oil or melted butter
2 tablespoons maple syrup
1 cup canned pumpkin puree
½ cup full-fat coconut milk (or dairy-free cream)
¼ cup maple syrup
⅓ cup almond butter or peanut butter
2 teaspoons pumpkin pie spice
1 teaspoon vanilla extract
⅛ teaspoon salt
1 tablespoon cornstarch or arrowroot powder
Optional: Coconut whipped cream, crushed pecans, cinnamon dusting
Instructions
- In a bowl, combine graham cracker crumbs, melted coconut oil, and maple syrup. Mix until fully combined and sticky.
- Press the mixture firmly into a 9-inch pie dish to form the crust. Place in the freezer to firm up while you prepare the filling.
- In another bowl, mix pumpkin puree, coconut milk, maple syrup, almond butter, pumpkin pie spice, vanilla extract, salt, and cornstarch until smooth and creamy.
- Pour the filling over the prepared crust and spread it evenly with a spatula.
- Refrigerate the pie for at least 6 hours or overnight until completely set.
- Before serving, top with coconut whipped cream, crushed pecans, and a dusting of cinnamon if desired.
Notes
Swap almond butter with cashew or sunflower seed butter for different flavors or nut-free option.
Layer melted dark chocolate over the crust before adding filling for extra indulgence.
Use dairy-free cream cheese for a firmer texture.
Add a splash of bourbon or rum to the filling for a festive twist.
Store covered in the fridge for up to 5 days or freeze for up to 2 months.
- Prep Time: 10 minutes
- Cook Time: 0 minutes
- Category: Dessert
- Method: No-Bake
- Cuisine: American
Nutrition
- Serving Size: 1 slice
- Calories: 290
- Sugar: 10g
- Sodium: 80mg
- Fat: 20g
- Saturated Fat: 9g
- Unsaturated Fat: 10g
- Trans Fat: 0g
- Carbohydrates: 24g
- Fiber: 3g
- Protein: 4g
- Cholesterol: 0mg

