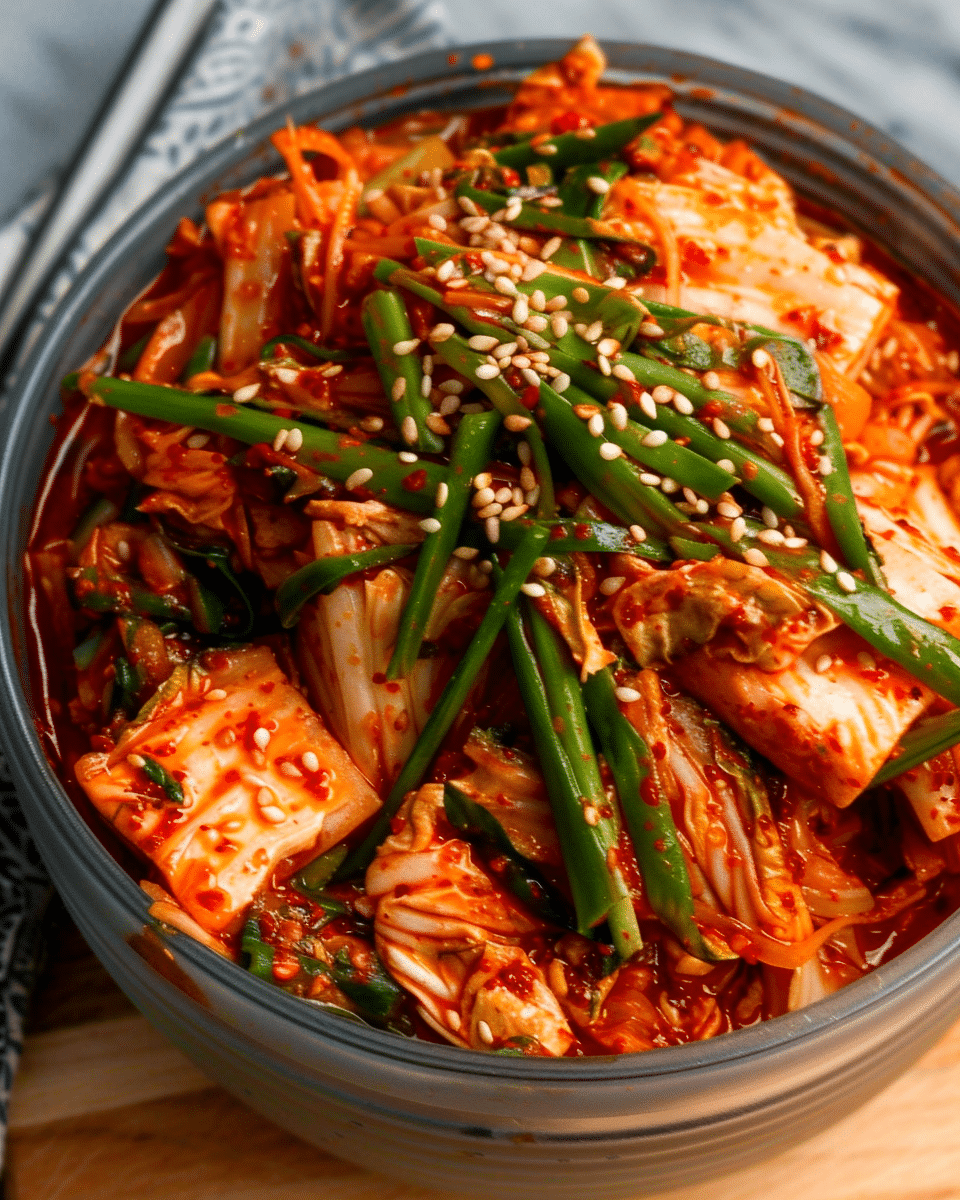
Traditional Korean fermented cabbage gets a plant-based makeover with this flavorful vegan kimchi. It's packed with spice, umami, and natural probiotics that support gut health. I like making this recipe at home because it’s vibrant, tangy, and incredibly versatile—perfect as a side, topping, or ingredient in other dishes.

Ingredients
(Tip: You'll find the full list of ingredients and measurements in the recipe card below.)
1 medium napa cabbage
¼ cup sea salt (non-iodized)
4 cups water
1 tablespoon grated ginger
1 tablespoon minced garlic
1 tablespoon maple syrup
2 tablespoons gluten-free soy sauce or tamari
1 tablespoon rice vinegar
2 teaspoons Korean red pepper flakes (gochugaru), adjust to taste
1 small daikon radish, julienned
4 green onions, chopped
1 medium carrot, julienned
Directions
I start by chopping the napa cabbage into bite-sized pieces. Then I dissolve the sea salt in water and soak the cabbage for 1 to 2 hours, tossing occasionally until it softens.
I rinse the cabbage under cold water several times to remove the excess salt and then set it aside to drain.
In a large bowl, I whisk together ginger, garlic, maple syrup, soy sauce, rice vinegar, and gochugaru to create a spicy, flavorful paste.
I add the cabbage, daikon, carrot, and green onions to the paste and massage it thoroughly with gloved hands until all the veggies are evenly coated.
Then I tightly pack everything into a clean glass jar, pressing it down to eliminate air pockets while leaving at least 1 inch of space at the top.
I cover the jar loosely and let it ferment at room temperature for 2 to 5 days. Each day, I open the lid to release built-up gas and press the vegetables down.
Once the taste is tangy and fermented enough for me, I seal the jar and store it in the fridge, where the flavors continue to deepen over time.
Servings and timing
This recipe makes about 20 servings, with each serving around ¼ cup. It takes approximately 30 minutes to prep, followed by 2 to 5 days of fermentation. The total time required is a minimum of 2 days, depending on how tangy I like it.
Variations
I sometimes mix it up by adding shredded purple cabbage for extra color or swapping the daikon for regular radish when I don’t have any on hand. If I’m in the mood for more heat, I double the gochugaru. For a sweeter, more mellow profile, I reduce the spice and add a little extra maple syrup.
Storage/Reheating
Once it’s fermented to my liking, I store the kimchi in the fridge in an airtight jar. It keeps for up to 4 weeks, often longer. Since it’s a cold-fermented dish, there’s no need to reheat—it’s best served chilled or at room temperature. I always use a clean utensil to avoid contamination and preserve freshness.
FAQs
How do I know when the kimchi is done fermenting?
I usually go by taste and smell. It should smell pleasantly sour and taste tangy, slightly spicy, and rich. If it still tastes like raw vegetables after a few days, I let it ferment longer.
Can I make this without gochugaru?
Yes, but the flavor won’t be as traditional. I’ve used crushed red pepper flakes or a dash of chili paste in a pinch, though I prefer gochugaru for its mild, smoky heat.
Is it safe to eat if bubbles form in the jar?
Absolutely. Bubbles are a sign of healthy fermentation. I just make sure to release the gas once a day and keep the vegetables submerged in their own brine.
What should I do if the kimchi smells off?
If it smells rotten, overly sour, or has mold, I toss it. A strong, tangy smell is normal, but anything foul or slimy is a red flag.
Can I speed up the fermentation?
A warmer room (around 75°F) will help it ferment faster. I also sometimes add a spoonful of brine from a previous batch to jump-start the process.
Conclusion
I love making this vegan kimchi not just because it’s healthier and plant-based, but because it’s alive with flavor and tradition. It brings depth to rice bowls, noodle dishes, soups, or even sandwiches. Once I got the hang of it, I started making it regularly—every batch a little different, but always delicious. If you're new to fermentation, this is a great place to start.
Recipe:

Vegan Kimchi
5 Stars 4 Stars 3 Stars 2 Stars 1 Star
No reviews
- Author: Cheryl
- Total Time: 2 days (minimum)
- Yield: 20 servings
- Diet: Vegan
Description
Traditional Korean fermented cabbage gets a plant-based twist in this bold and tangy vegan kimchi. It’s full of spice, umami, and natural probiotics that promote gut health, making it a vibrant and versatile staple for any plant-based kitchen.
Ingredients
1 medium napa cabbage
¼ cup sea salt (non-iodized)
4 cups water
1 tablespoon grated ginger
1 tablespoon minced garlic
1 tablespoon maple syrup
2 tablespoons gluten-free soy sauce or tamari
1 tablespoon rice vinegar
2 teaspoons Korean red pepper flakes (gochugaru), adjust to taste
1 small daikon radish, julienned
4 green onions, chopped
1 medium carrot, julienned
Instructions
- Chop the napa cabbage into bite-sized pieces.
- Dissolve the sea salt in water and soak the cabbage for 1 to 2 hours, tossing occasionally until it softens.
- Rinse the cabbage under cold water several times to remove excess salt and set aside to drain.
- In a large bowl, whisk together ginger, garlic, maple syrup, soy sauce, rice vinegar, and gochugaru to form a paste.
- Add cabbage, daikon, carrot, and green onions to the paste and massage with gloved hands until evenly coated.
- Pack the mixture tightly into a clean glass jar, pressing it down to remove air pockets. Leave at least 1 inch of space at the top.
- Cover the jar loosely and ferment at room temperature for 2 to 5 days, opening daily to release gas and press vegetables down.
- Once tangy and fermented to taste, seal the jar and refrigerate. The flavor will continue to develop over time.
Notes
Use non-iodized salt to ensure proper fermentation.
Fermentation time varies based on room temperature—warmer rooms speed up the process.
Always use a clean utensil to prevent contamination.
Add shredded purple cabbage or swap daikon for variety.
Adjust spice level by increasing or decreasing gochugaru.
- Prep Time: 30 minutes
- Cook Time: 0 minutes
- Category: Side Dish
- Method: Fermentation
- Cuisine: Korean
Nutrition
- Serving Size: ¼ cup
- Calories: 15
- Sugar: 1g
- Sodium: 300mg
- Fat: 0g
- Saturated Fat: 0g
- Unsaturated Fat: 0g
- Trans Fat: 0g
- Carbohydrates: 3g
- Fiber: 1g
- Protein: 0g
- Cholesterol: 0mg


