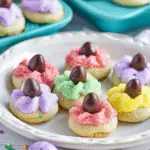
These colorful and festive Easter Blossom Cookies are soft, buttery, and topped with a sweet chocolate kiss, making them the perfect treat for celebrating the season. With their fun pastel-colored sugar coating, they add a delightful touch to any Easter celebration.

Ingredients
(Tip: You'll find the full list of ingredients and measurements in the recipe card below.)
1 ¾ cups all-purpose flour
½ teaspoon baking soda
½ teaspoon salt
1 cup unsalted butter, softened
1 cup granulated sugar, divided
1 large egg
1 teaspoon vanilla extract
¼ cup sprinkles (preferably pastel-colored)
20 chocolate kisses, unwrapped
Directions
Preheat the oven to 350°F (175°C) and line a baking sheet with parchment paper.
In a medium bowl, whisk together the flour, baking soda, and salt. Set aside.
In a large bowl, cream together the softened butter and ½ cup of sugar using a hand mixer or stand mixer until light and fluffy, about 2-3 minutes.
Add the egg and vanilla extract to the butter mixture, and beat until combined.
Gradually add the dry ingredients to the wet ingredients, mixing until just combined.
Place the remaining ½ cup of sugar into a shallow bowl. Scoop tablespoon-sized portions of dough and roll them into balls. Then roll the dough balls in the sugar until coated.
Place the dough balls onto the prepared baking sheet about 2 inches apart.
Bake for 8-10 minutes, or until the cookies are lightly golden at the edges.
As soon as the cookies come out of the oven, press a chocolate kiss into the center of each cookie. Let the cookies cool on the baking sheet for a few minutes before transferring them to a wire rack to cool completely.
Servings and Timing
Prep Time: 15 minutes
Cooking Time: 10 minutes
Total Time: 25 minutes
Servings: 20 cookies
Calories per cookie: 140 kcal
Variations
Colorful Sugar Coating – Instead of rolling the cookies in plain granulated sugar, I like to use pastel-colored sanding sugar or a mix of festive sprinkles for an extra decorative touch.
Different Chocolate Centers – While chocolate kisses are classic, I sometimes switch them up with white chocolate kisses, caramel-filled chocolates, or even peanut butter cups for a fun variation.
Flavored Dough – Adding a bit of almond or coconut extract in place of the vanilla can give the cookies a unique twist.
Gluten-Free Option – I use a 1:1 gluten-free baking flour to make these cookies gluten-free without sacrificing texture.
Storage/Reheating
I store these cookies in an airtight container at room temperature for up to 5 days. If I want to keep them fresh longer, I place them in the refrigerator for up to a week. For freezing, I let them cool completely, then freeze them in a single layer in an airtight container for up to 3 months. When ready to eat, I let them thaw at room temperature.
FAQs
How do I keep the chocolate kisses from melting too much?
I press the chocolate kisses into the cookies immediately after baking but avoid handling them too much. Letting the cookies cool completely helps the chocolate hold its shape.
Can I make the dough ahead of time?
Yes! I prepare the dough, roll it into balls, and store them in the refrigerator for up to 2 days before baking. If freezing, I place the dough balls on a baking sheet to freeze, then transfer them to a freezer bag.
What can I use instead of sprinkles?
If I don’t have pastel sprinkles, I roll the dough in colored sugar or even coconut flakes for a fun texture and look.
Can I make these cookies softer or crispier?
For softer cookies, I bake them for the minimum time and remove them as soon as the edges start turning golden. For a crispier texture, I bake them an extra minute or two.
What’s the best way to package these for gifting?
I place them in a decorative tin or cellophane bag tied with a ribbon. To prevent smudging the chocolate, I layer them between parchment paper.
Conclusion
Easter Blossom Cookies are a delightful, festive treat that adds a pop of color and sweetness to any Easter celebration. I love how simple they are to make, yet they always impress with their soft texture and chocolatey center. Whether serving them at a holiday gathering or gifting them to loved ones, these cookies are sure to be a hit.
Recipe:
Easter Blossom Cookies
- Total Time: 25 minutes
- Yield: 20 cookies
- Diet: Vegetarian
Description
These colorful and festive Easter Blossom Cookies are soft, buttery, and topped with a sweet chocolate kiss, making them the perfect treat for celebrating the season. With their fun pastel-colored sugar coating, they add a delightful touch to any Easter celebration.
Ingredients
1 ¾ cups all-purpose flour
½ teaspoon baking soda
½ teaspoon salt
1 cup unsalted butter, softened
1 cup granulated sugar, divided
1 large egg
1 teaspoon vanilla extract
¼ cup sprinkles (preferably pastel-colored)
20 chocolate kisses, unwrapped
Instructions
- Preheat & Prep: Preheat the oven to 350°F (175°C) and line a baking sheet with parchment paper.
- Mix Dry Ingredients: In a medium bowl, whisk together the flour, baking soda, and salt. Set aside.
- Cream Butter & Sugar: In a large bowl, beat the softened butter and ½ cup of sugar until light and fluffy (about 2-3 minutes).
- Combine Wet Ingredients: Add the egg and vanilla extract, then mix until well combined.
- Form Dough: Gradually mix in the dry ingredients until just combined.
- Coat in Sugar: Place the remaining ½ cup of sugar in a shallow bowl. Scoop tablespoon-sized dough portions, roll into balls, and coat them in the sugar.
- Bake: Arrange the dough balls 2 inches apart on the prepared baking sheet. Bake for 8-10 minutes until the edges are lightly golden.
- Add Chocolate Kiss: Immediately press a chocolate kiss into the center of each warm cookie.
- Cool & Serve: Let cookies cool on the baking sheet for a few minutes before transferring them to a wire rack to cool completely.
Notes
For extra color, use pastel sanding sugar instead of granulated sugar.
Swap the chocolate kiss with white chocolate, caramel-filled chocolates, or peanut butter cups.
For a unique flavor, substitute almond or coconut extract for vanilla.
Make it gluten-free by using a 1:1 gluten-free baking flour.
- Prep Time: 15 minutes
- Cook Time: 10 minutes
- Category: Dessert
- Method: Baking
- Cuisine: American
Nutrition
- Serving Size: 20 cookies
- Calories: 140 kcal

