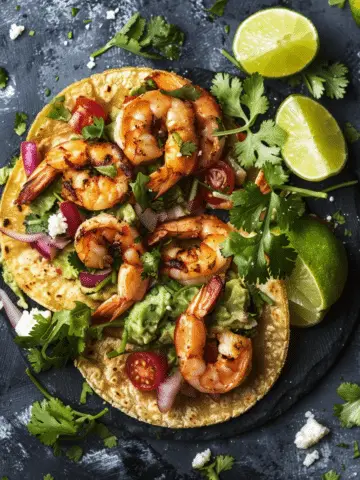
These Garlic Butter Honey BBQ Beef Tacos are a perfect balance of savory, sweet, and smoky flavors, creating a dish that’s ideal for any occasion. Tender ground beef is cooked in a rich garlic butter sauce, then tossed in a tangy honey BBQ glaze, all wrapped in soft taco shells. It’s a fun, flavor-packed meal that’s sure to be a hit at your dinner table.

Ingredients
1 lb ground beef
2 tablespoons unsalted butter
4 cloves garlic, minced
¼ cup honey
¼ cup BBQ sauce (your favorite kind)
1 tablespoon soy sauce
1 teaspoon smoked paprika
½ teaspoon ground black pepper
½ teaspoon onion powder
1 tablespoon lime juice
8 small soft taco shells
¼ cup chopped cilantro (for garnish)
¼ cup crumbled queso fresco (optional)
(Tip: You'll find the full list of ingredients and measurements in the recipe card below.)
Directions
In a large skillet, melt the butter over medium heat. Add the minced garlic and sauté for about 1 minute, or until fragrant.
Add the ground beef to the skillet and cook, breaking it apart with a spoon, until browned and cooked through (about 5-7 minutes).
In a small bowl, whisk together honey, BBQ sauce, soy sauce, smoked paprika, black pepper, onion powder, and lime juice.
Pour the sauce mixture over the cooked beef and stir well to coat the meat evenly. Let it simmer for 2-3 minutes, allowing the sauce to thicken slightly.
Warm the taco shells in the oven or microwave according to package instructions.
Spoon the BBQ beef mixture into each taco shell and garnish with chopped cilantro and crumbled queso fresco, if desired.
Serve immediately and enjoy!
Servings and Timing
Servings: 4 servings
Prep Time: 10 minutes
Cooking Time: 10 minutes
Total Time: 20 minutes
Variations
Spicy Kick: Add some sliced jalapeños or a dash of hot sauce to the beef mixture for extra heat.
Vegetarian Version: Substitute the ground beef with black beans or plant-based crumbles for a vegetarian-friendly option.
Extra Crunch: For some added texture, top the tacos with shredded lettuce or crunchy coleslaw.
Cheese Swap: If queso fresco isn’t available, shredded cheddar or Monterey Jack also works great.
Storage/Reheating
Storage: Leftover BBQ beef can be stored in an airtight container in the refrigerator for up to 3 days.
Reheating: Reheat the beef in a skillet over low heat, stirring occasionally until heated through. Warm up the taco shells separately, and assemble your tacos once the beef is reheated.
FAQs
Can I use a different type of meat for this recipe?
Yes, ground turkey, chicken, or even pork can be used instead of beef for a lighter alternative.
How can I make the tacos spicier?
You can add sliced jalapeños to the beef mixture or drizzle some hot sauce on top of the finished tacos to give them an extra kick.
Can I make the beef mixture ahead of time?
Yes, you can prepare the beef mixture in advance and store it in the refrigerator for up to 3 days. Just reheat it before serving.
What toppings go well with these tacos?
I love adding cilantro, crumbled queso fresco, and a squeeze of lime. You can also try shredded lettuce, diced tomatoes, avocado slices, or sour cream for additional toppings.
Can I freeze the beef mixture?
Yes, you can freeze the BBQ beef mixture in an airtight container for up to 2 months. Thaw in the fridge overnight before reheating.
Conclusion
These Garlic Butter Honey BBQ Beef Tacos are the ultimate weeknight meal or party dish, offering a delicious mix of smoky, savory, and sweet flavors in every bite. With a quick prep time and the option to customize toppings, it’s a recipe I keep coming back to time and again. Whether I’m cooking for a crowd or just myself, these tacos are always a hit!
Recipe:

Garlic Butter Honey BBQ Beef Tacos
5 Stars 4 Stars 3 Stars 2 Stars 1 Star
No reviews
- Author: Cheryl
- Total Time: 20 minutes
- Yield: 4 servings
- Diet: Low Calorie
Description
Garlic Butter Honey BBQ Beef Tacos are a perfect balance of savory, sweet, and smoky flavors, creating a quick and delicious meal for any occasion.
Ingredients
1 lb ground beef
2 tablespoons unsalted butter
4 cloves garlic, minced
¼ cup honey
¼ cup BBQ sauce (your favorite kind)
1 tablespoon soy sauce
1 teaspoon smoked paprika
½ teaspoon ground black pepper
½ teaspoon onion powder
1 tablespoon lime juice
8 small soft taco shells
¼ cup chopped cilantro (for garnish)
¼ cup crumbled queso fresco (optional)
Instructions
- In a large skillet, melt the butter over medium heat. Add the minced garlic and sauté for about 1 minute, or until fragrant.
- Add the ground beef to the skillet and cook, breaking it apart with a spoon, until browned and cooked through (about 5-7 minutes).
- In a small bowl, whisk together honey, BBQ sauce, soy sauce, smoked paprika, black pepper, onion powder, and lime juice.
- Pour the sauce mixture over the cooked beef and stir well to coat the meat evenly. Let it simmer for 2-3 minutes, allowing the sauce to thicken slightly.
- Warm the taco shells in the oven or microwave according to package instructions.
- Spoon the BBQ beef mixture into each taco shell and garnish with chopped cilantro and crumbled queso fresco, if desired.
- Serve immediately and enjoy!
Notes
You can add sliced jalapeños or hot sauce for a spicy kick.
For a vegetarian version, substitute the ground beef with black beans or plant-based crumbles.
For extra crunch, top with shredded lettuce or crunchy coleslaw.
If queso fresco isn’t available, shredded cheddar or Monterey Jack also works great.
Leftovers can be stored in an airtight container in the refrigerator for up to 3 days.
The beef mixture can be frozen for up to 2 months; just thaw and reheat before serving.
- Prep Time: 10 minutes
- Cook Time: 10 minutes
- Category: Main Dish
- Method: Stovetop
- Cuisine: Mexican
Nutrition
- Serving Size: 1 taco
- Calories: 350
- Sugar: 10g
- Sodium: 500mg
- Fat: 20g
- Saturated Fat: 8g
- Unsaturated Fat: 9g
- Trans Fat: 0g
- Carbohydrates: 25g
- Fiber: 2g
- Protein: 15g
- Cholesterol: 45mg


